Have you ever worked on your computer and haven't been able to access it later because you don’t have a copy on your phone?
Being stuck with an old or overwritten copy of an important document is frustrating. However, in recent years, a solution to this problem has been the use of cloud storage solutions like Dropbox and Google Drive. Through their increasing use, synchronisation has become more and more common. The synchronisation is the process where information located on one device is transferred, or sync’d, to another.
For example, when you use Obzervr, data is collected and stored on your mobile device using Obzervr Capture. Then, when you access Wi-Fi or network connection, the data captured is uploaded to the cloud, and shown in Obzervr Manager portal.
There are two ways to sync Obzervr Capture:
- Automatic Push sync
-
Manual sync
How Automatic Push Sync for Obzervr Capture works
Obzervr Capture will automatically sync any work being completed on the device in the background, without the user needing to synchronise. This is done if Capture is open and being used or has been put in the background while using other applications. This does not apply for new Work created in Obzervr Manager that need to be pulled down to the device. In this scenario, the User is required to manually synchronise.
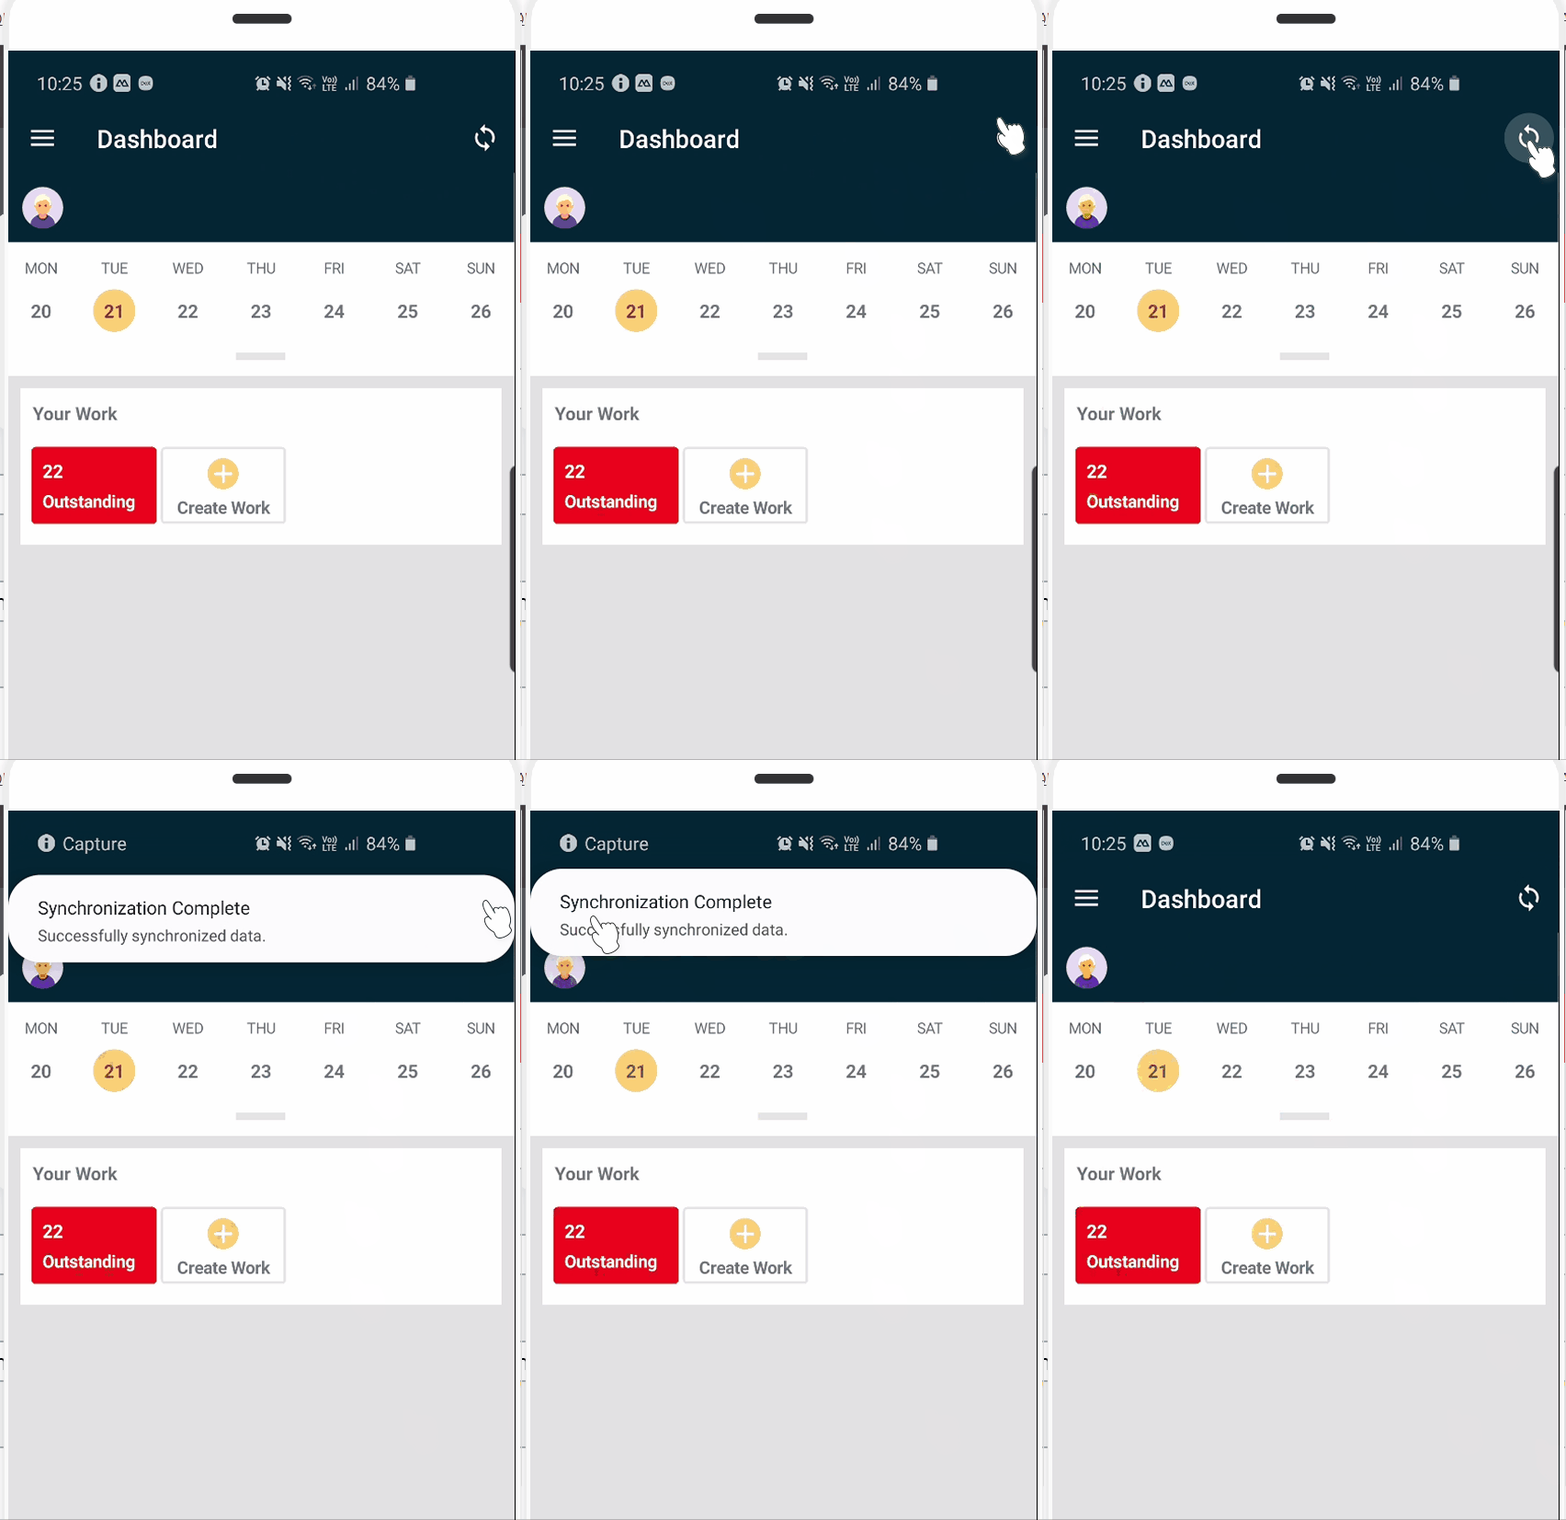
How to manually sync Obzervr Capture:
- Open Obzervr Capture and open the Dashboard or Job page.
- Tap on the sync icon
 . Once you initiate a sync, you will receive a notification showing the sync progress bar and a Synchronisation Complete message if you have successfully sync’d.

If your sync is not successful, you will receive a notification saying that there has been a sync error and that you need to contact an Administrator. If you’re having issues syncing, check out our other articles to get more info or contact Obzervr Support for help.
Comments
0 comments
Please sign in to leave a comment.