Trades and Field Teams asked us to provide a simpler way for them to search for specific items in a long interdependant lists e.g. searching for spares parts. Cascading drop-down list is a series of dependent drop-down lists in which the items in one drop-down list are populated based on an item selected by the user from another drop-down list.
In this article, we will walk you through the steps to set up this. If you have any questions contact us at support@obzervr.com or comment below.
Step 1: Create a table A that includes the searched information
If you already had the table data on the Obzervr Manager, you could skip step 1, 2 & 3.
-
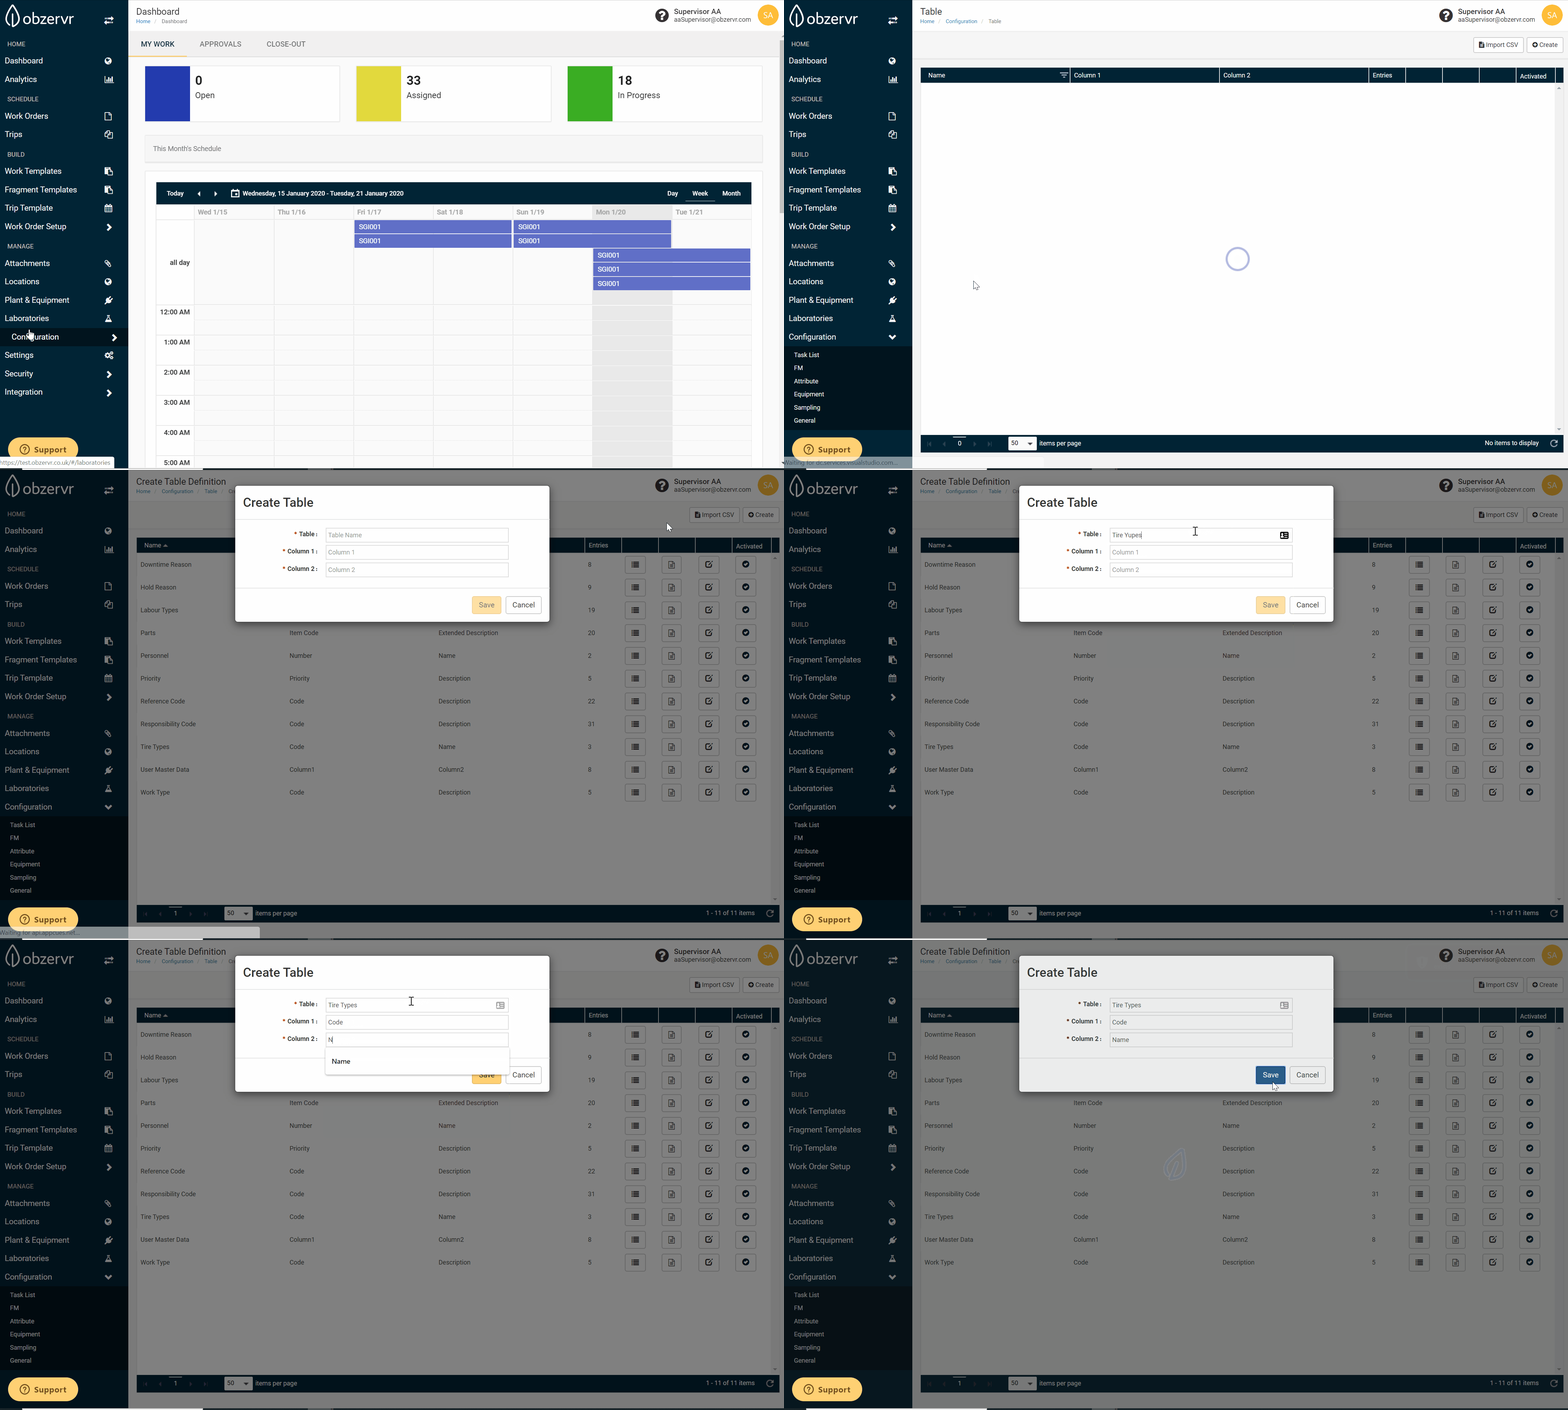
Open Obzervr Manager and navigate to the Configuration page.
-
Select Table from the list of options under Measurements menu option in Configuration (this may differ based on your unique label names). Then you have two options:
-
Click Create on the top-right corner to create a table. Then add all the relevant mandatory information.
-
Or click Import CSV
to upload your table data directly from your computer. The table data could be done using Excel and saved as the .csv file. Make sure you have the data for the reference column (third column) as the information here is used to reference for the data in this table. You can skip to step 3 from here.
-
Step 2: Add data to table A
-
Select the newly created table and click View Table Data.
-
Click Add Table Data to add value into the table.
Note: Ensure you add the data to Reference column as the information here is used to reference for the data in this table.
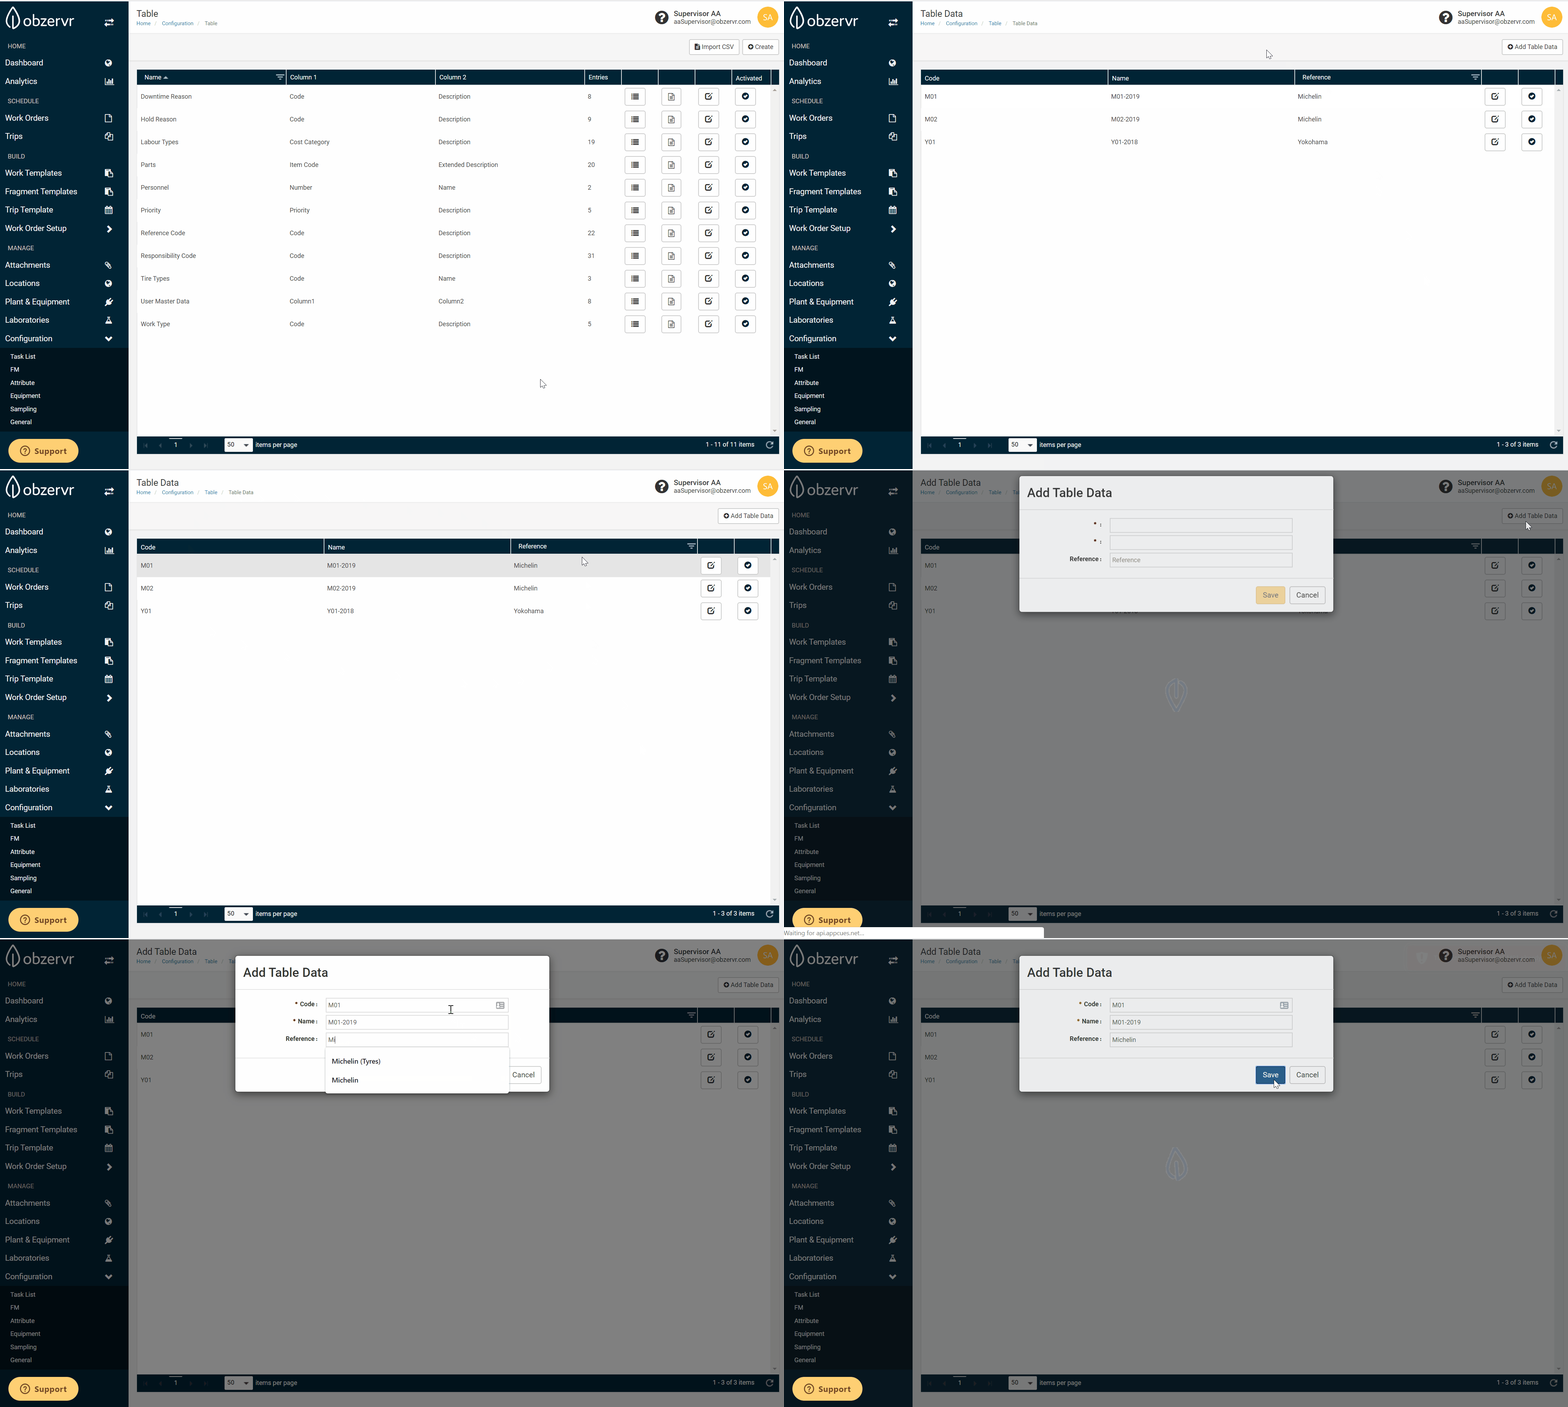
Image 02
Step 3: Create table B that includes referencing information
-
Repeat step 1 and 2 to create table B or upload a table B from your computer.
-
Note: Ensure that the value in the 1st column of this table (table B) is the same as the value in the Reference column in table A.
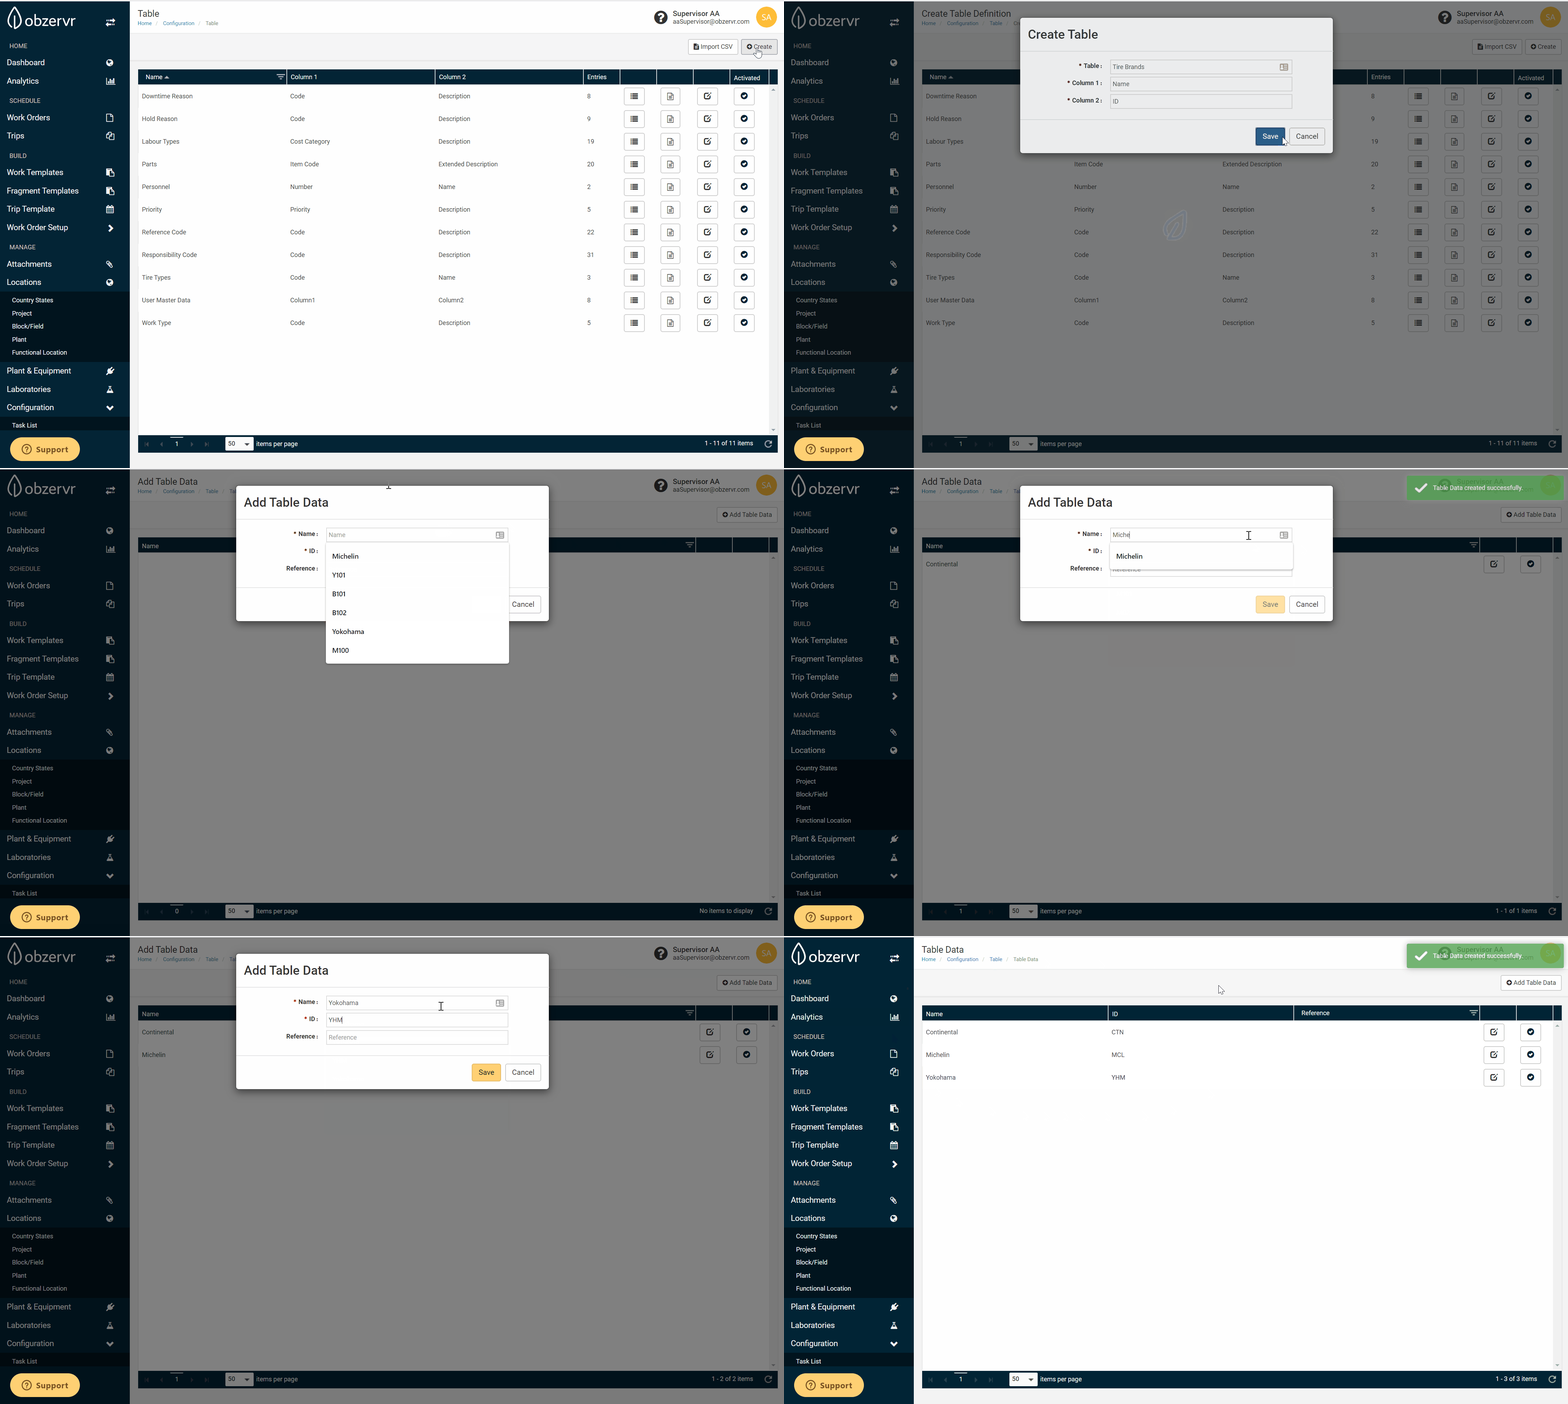
Image 03
Step 4: Create Cascading Drop-down List
-
Navigate to Work Templates page, click Create on the top-right corner to create new Work Template then add group and section to the desired work phase.
-
Click on Add Field. Add relevant mandatory information; make sure to choose "Table" as field type and table B as the field value.
-
The values in this field are used to lookup the desired data from other dependent tables.
-
-
Add another Field with type Table, input the table A and enable Cascading Table function. Input the Reference Type as "Field" and target the field created on step 4.2 (in Select a field).
-
This Field would display only relevant results of the lookup.
-
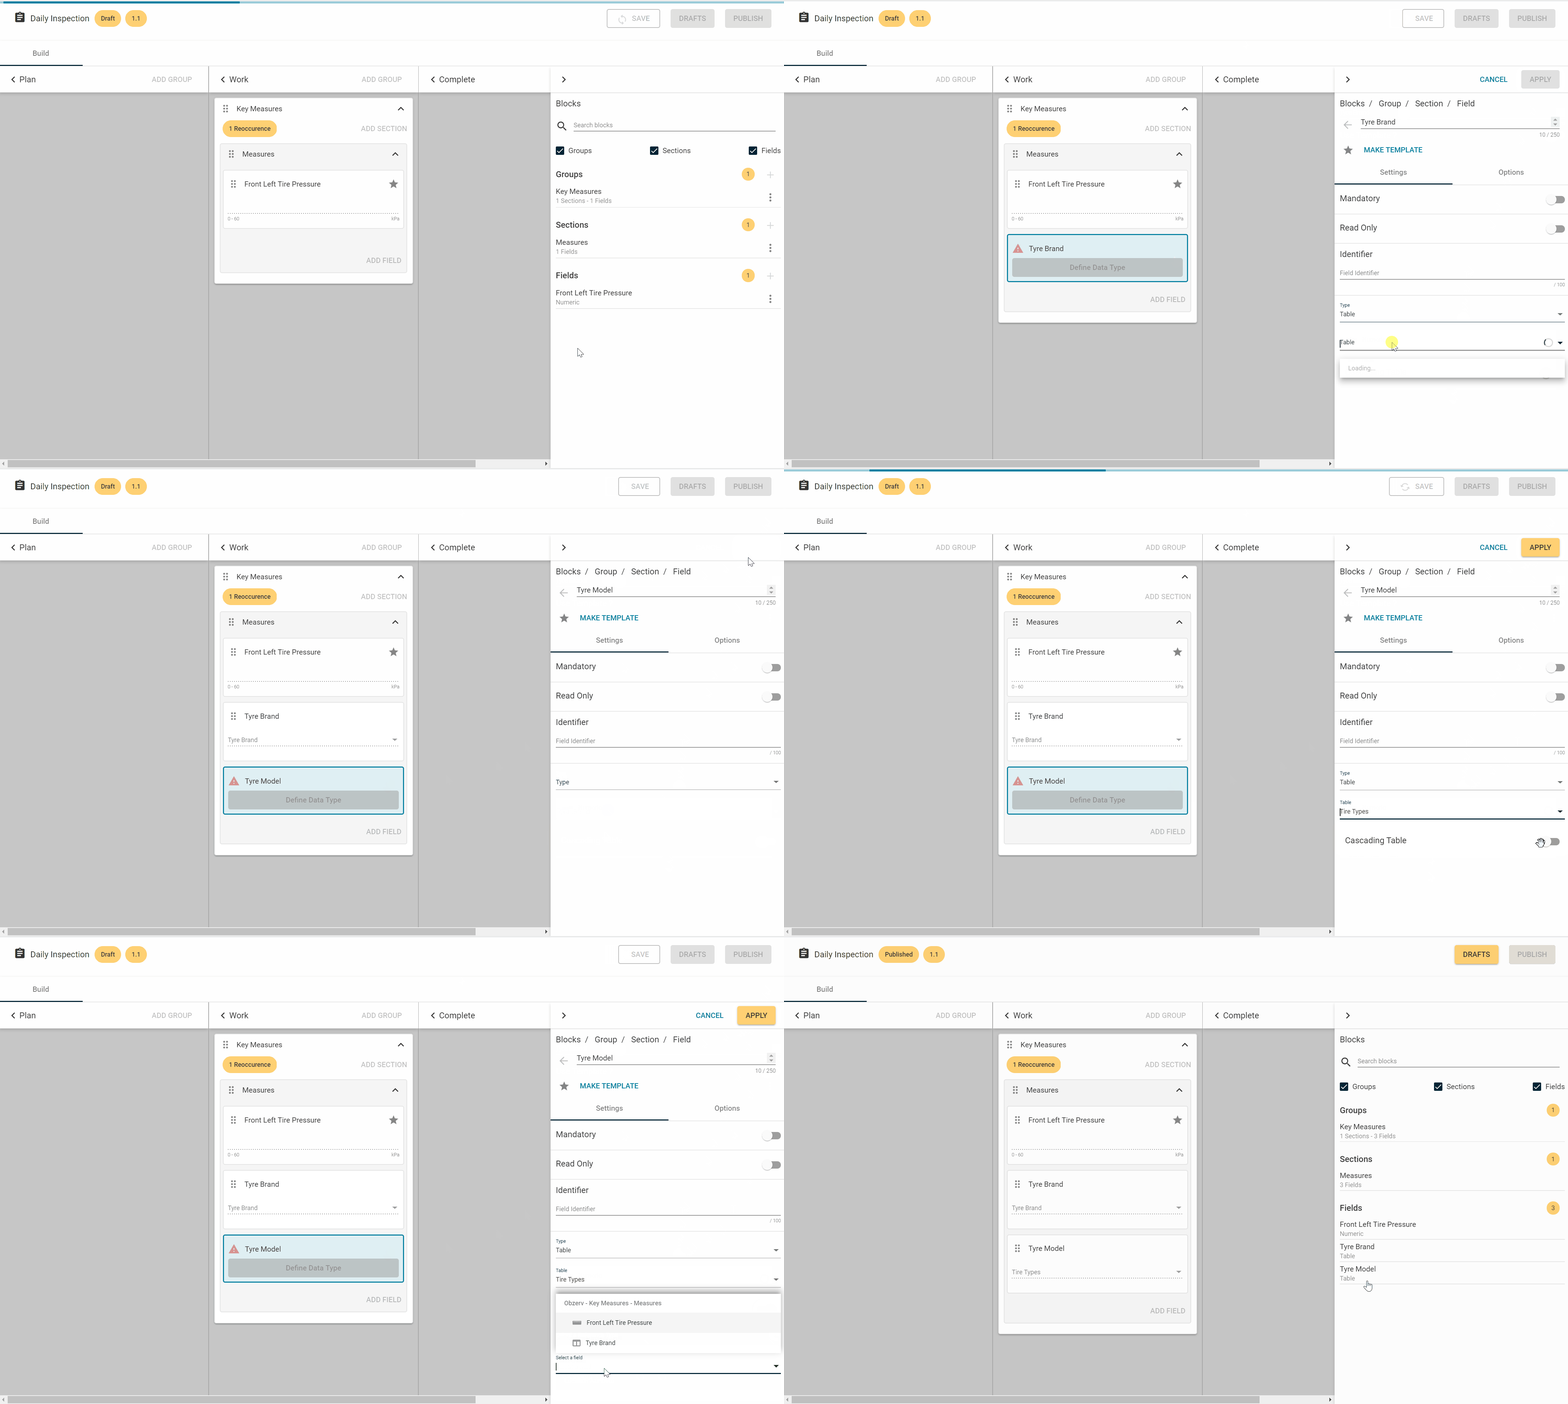
Image 04
- Result
As demonstrated from images in step 1, 2, 3 & 4:
- Create tables named Tyre Brand (table B) and Tire Types (table A) with the relevant mandatory information.
- Add Work Templates with the listed fields:
- Add the field Tyre Brand with Table type and including Tyre Brand table data. The values in this field are used to look up the desired data from the Tire Types table.
- Add another field Tyre Model with Cascading Table enabled, input the Tyre Types table, select Field as Reference Type and target the Tyre Brand field.
- Publish the Work Template. Then add an assignment using this Work Template.
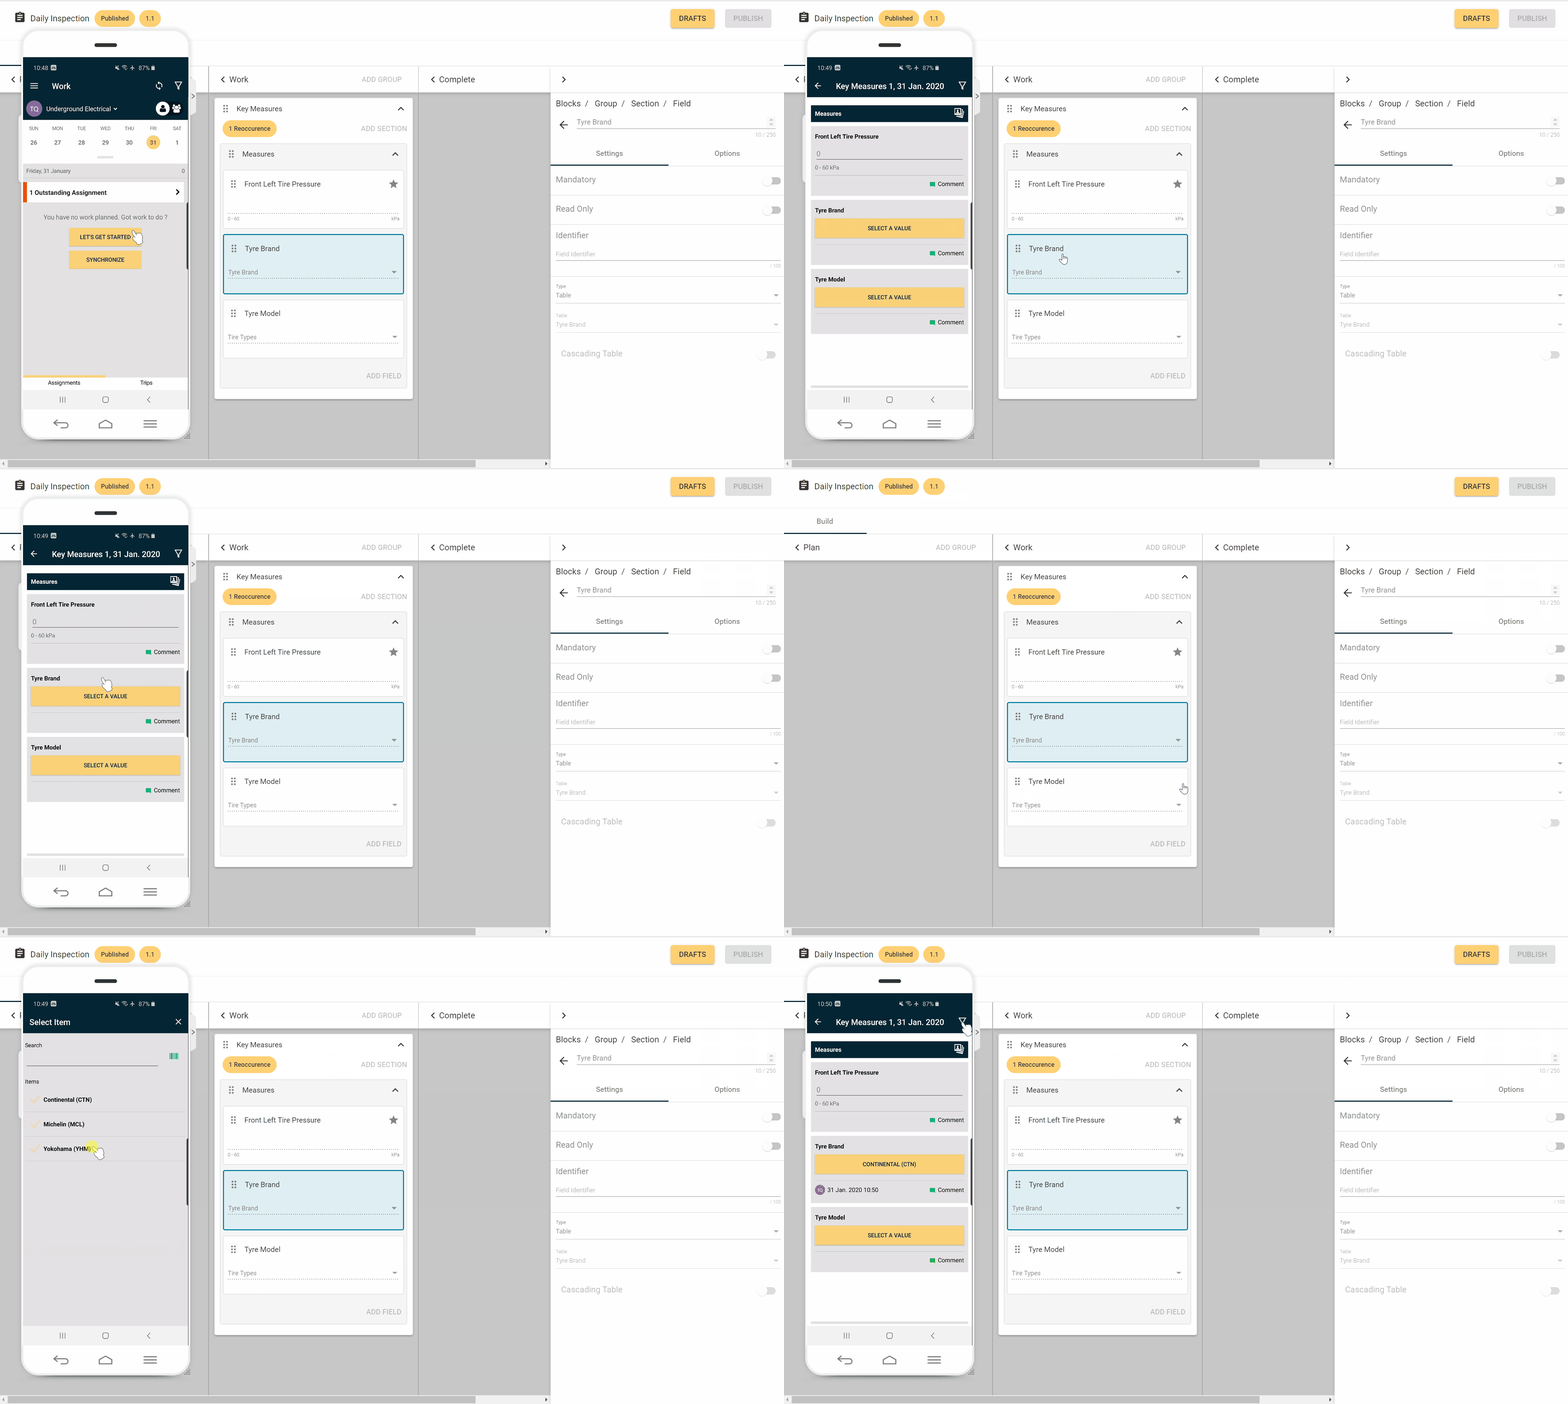
The results displayed on the app as follow:
- Choose Michelin as the Tyre Brand results in only Michelin's relevant data shown in Type Model.
- Choose Yokohama as the Tyre Brand results in only Yokohama's relevant data shown in Type Model.
- Choose Continental results in no data shown as there was no Continental's relevant data set up.
Want to hear more about Obzervr? Check out our support videos, website (www.obzervr.com), or social media pages (LinkedIn, Twitter or Facebook).
Leave a comment below and click to let us know if this article was helpful!
Comments
0 comments
Please sign in to leave a comment.