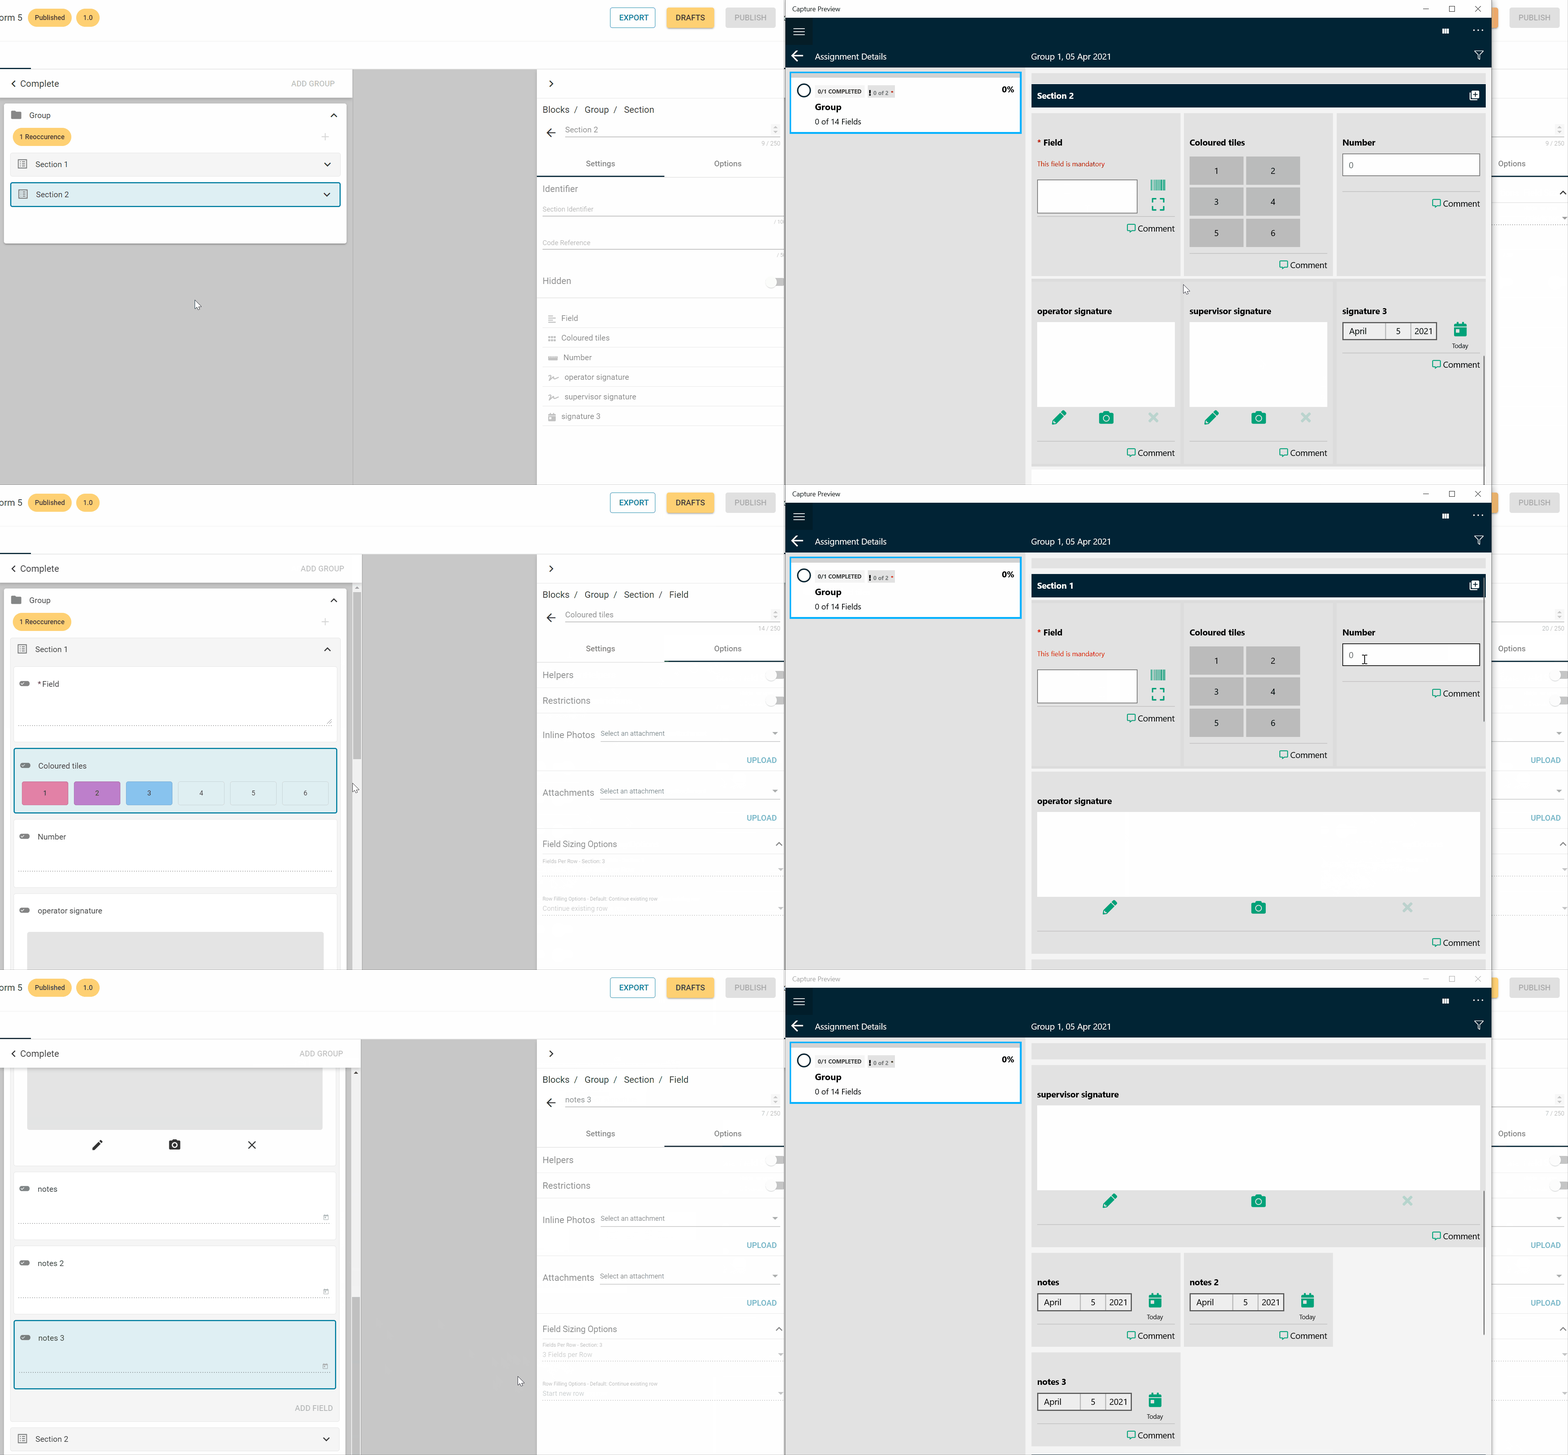
The Obzervr Capture version 1.41+ allows users to configure a number of fields in a group/section to appear next to each other instead of only on top of each other.
This new feature allows you to go through the form on tablets/ large tablets with less scroll. This can be set up on both the Section and Field level. You can set up all the fields in the selected Section or individual fields.
To configure this, you will need access to Manager > Designer.
Section level
At the Section level, once you configure it will apply to all the fields in it.
When selecting these options be mindful of the devices your users will be using and how sections may appear on these devices (e.g. setting up 3 fields per row may not be the best option for users using a phone).
- Select the Section
- Navigate to Options tab
- Select the number of Field per Row
- Click to Apply
- Save then Publish the Template

Figure 1: How to set up 3 Fields per Row for the Section 1 Section
Once published, you will need to re-sync the app before creating a new Work to see the changes

Figure 2: How 3 Fields per Row for Section 1 are seen on the Capture app
Field level
At the Field level, regardless of the Section set up, users can modify the number of fields per row to best suit the display on the tablets or based on the Form. The number of fields per row can be mixed between 3 per row and 2 per rows and 1 per rows.
- Select the Field you want to set up
- Navigate to Options tab
- Select the number of Field per Row
- Click to Apply
- Select other fields and repeat steps 1 to 4
- Save then Publish the Template

Figure 3: How 3 Fields per Row mixed with 2 fields per row and 1 field per row
Additionally, you can select at which field a new row should be started or continue on the same row. So, regardless of having 3 fields per row, if a Field was selected to be starting a new row, it will be broken down into a new row.
- Select the Field you want to set up
- Navigate to Options tab
- On the Row Filling Options - Default Continue existing row, click on the drop-down to select the Start new row

Figure 4: Set up a field to start a new row
- Click to Apply
- Select other fields and repeat steps 1 to 4
- Save then Publish the Template
The break-down field will not be fully displayed with the full width as a sole field in a row.

Figure 5: Field starting a new row
To summarise, the following gif will demonstrate how the fields are wrapped and presented on Capture

Figure 6: Field columns
---
Want to hear more about Obzervr? Check out our support videos, website (www.obzervr.com), or social media pages (LinkedIn, Twitter or Facebook).
Leave a comment below and click to let us know if this article was helpful!
Comments
0 comments
Please sign in to leave a comment.