Want to learn more about the fields you capture on the Obzervr Capture app?
Before you go ahead with learning how to enter data to Work on Obzervr Capture, make sure you have read these articles to understand about Work on Obzervr:
Data is commonly collected using checklists, service sheets or forms. These are usually checklists which must be completed throughout a job. A checklist can usually be broken down into Task Lists, Field Measurements and Groups. Let’s check out what a Task List, Field Measurement and Groups look like.
How to fill out the Work with different Field type?
- Open the Obzervr Capture app, select Work and select the Work tab.
- You will see the Field Measurements option and if you click on it, there are Fields separated by Sections.
- Each field can have one of the following data types:
- Numeric range – green is in the range and red is out of range. This is an exceedance and will alert the Obzervr Administrator. By providing a range of acceptable field measurement, it prompts users to check their measurement or act proactively. These field measurements use a Unit of Measurement (UOM), upper and lower boundary value. i.e. pH (from 1 – 14) or 240V AC UPS Inverter 11BRU10 (from 0 – 100%)
- Tiles – select the box to choose your answer i.e. Underfloor area ventilation fans running. i.e. OK or NOT OK.
- Dropdowns – select your answer from the list of options i.e. Reason field measures not taken.
- Table - select your answer from the list of options in the table. This field type is handy in using Cascading table.
- Date – add a date for the field measurement i.e. Installation date
- Time – add time for the field measurement i.e. SCADA panel time
- Notes – write a description for your observation i.e. Local Bore Name or Property Name
- Signature/Drawing – useful for instances where you need to sign-off that you’ve completed the work i.e. Control room sign-off
- Checkbox
- Multi-Select
There are also some general features which each field measure has:
- Photos
- Comments
How to filter different Field type?
Filter for measures with Exceptions, incomplete measures or mandatory measures. This will allow you to quickly determine which fields need to be actioned.
What happens after completing the task?
Once you complete each task, a timestamp is created and, if you go back to the previous page, the progress indicator will be 100%.

The timestamp is created every time each task is completed
How to use Groups
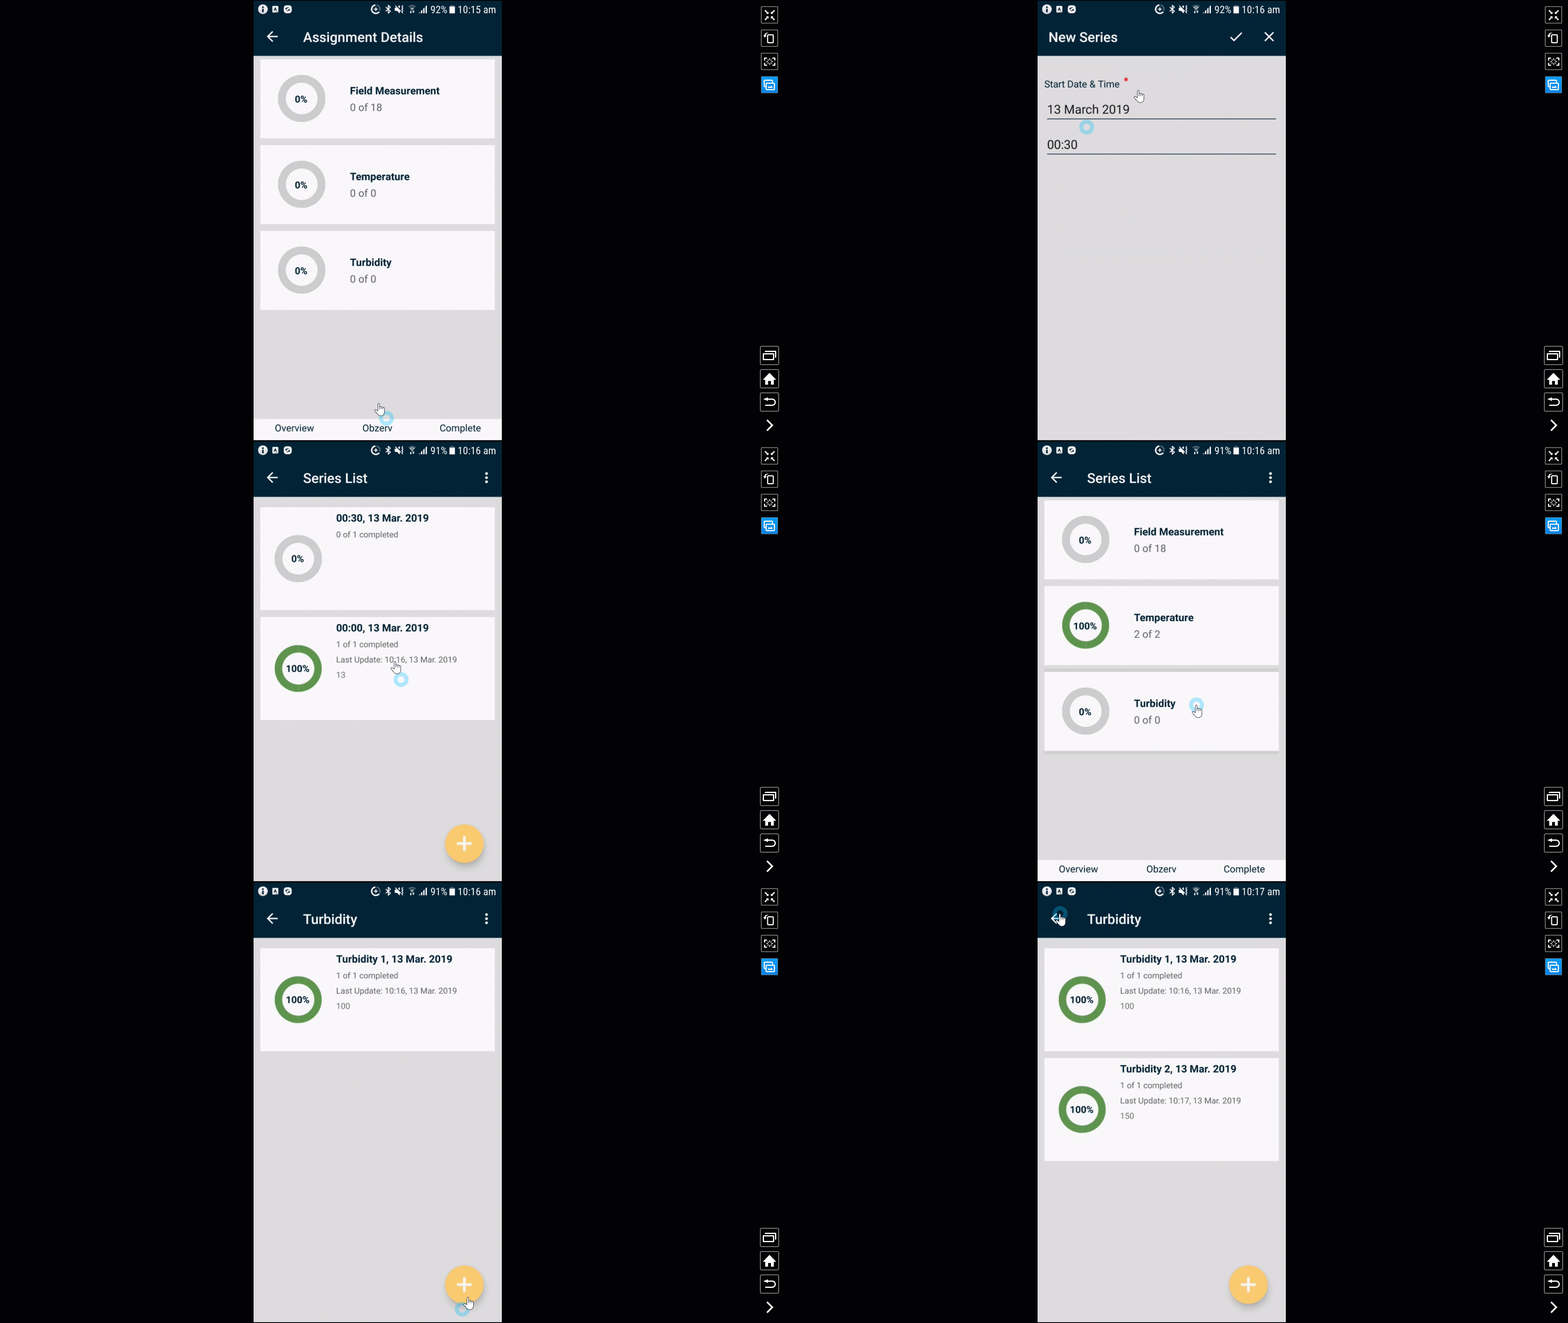
Another type of field measure is Groups. They can be created two ways – based on time or number. In this example, the Temperature and Turbidity sections are both groups. The Temperature group is time-based whereas turbidity is number-based.
- Click it and go through to the next page, you can see the three measurements I need to collect at each time interval. Choosing the first one, I can enter the temperature measurement I collect. Follow the same process for the next two.
- Choosing the Turbidity series, I will need to enter a name for the series, the date and time, and a number of occurrences. The only difference is that the Series is not named based on Time. Instead, they count up, starting at 0.

So that's the nuts and bolts of Obzervr Capture!
---

Comments
0 comments
Please sign in to leave a comment.