
Have you logged into Obzervr Capture and want to start learning how to use it?
If you haven’t logged in yet, you might need to have a look here first – How to login & sync Obzervr Capture.
Once you log in, you will see the Dashboard page! From this screen, you will be able to access the Menu, add new Assignments, and see where your existing Assignments will be displayed.
Dashboard
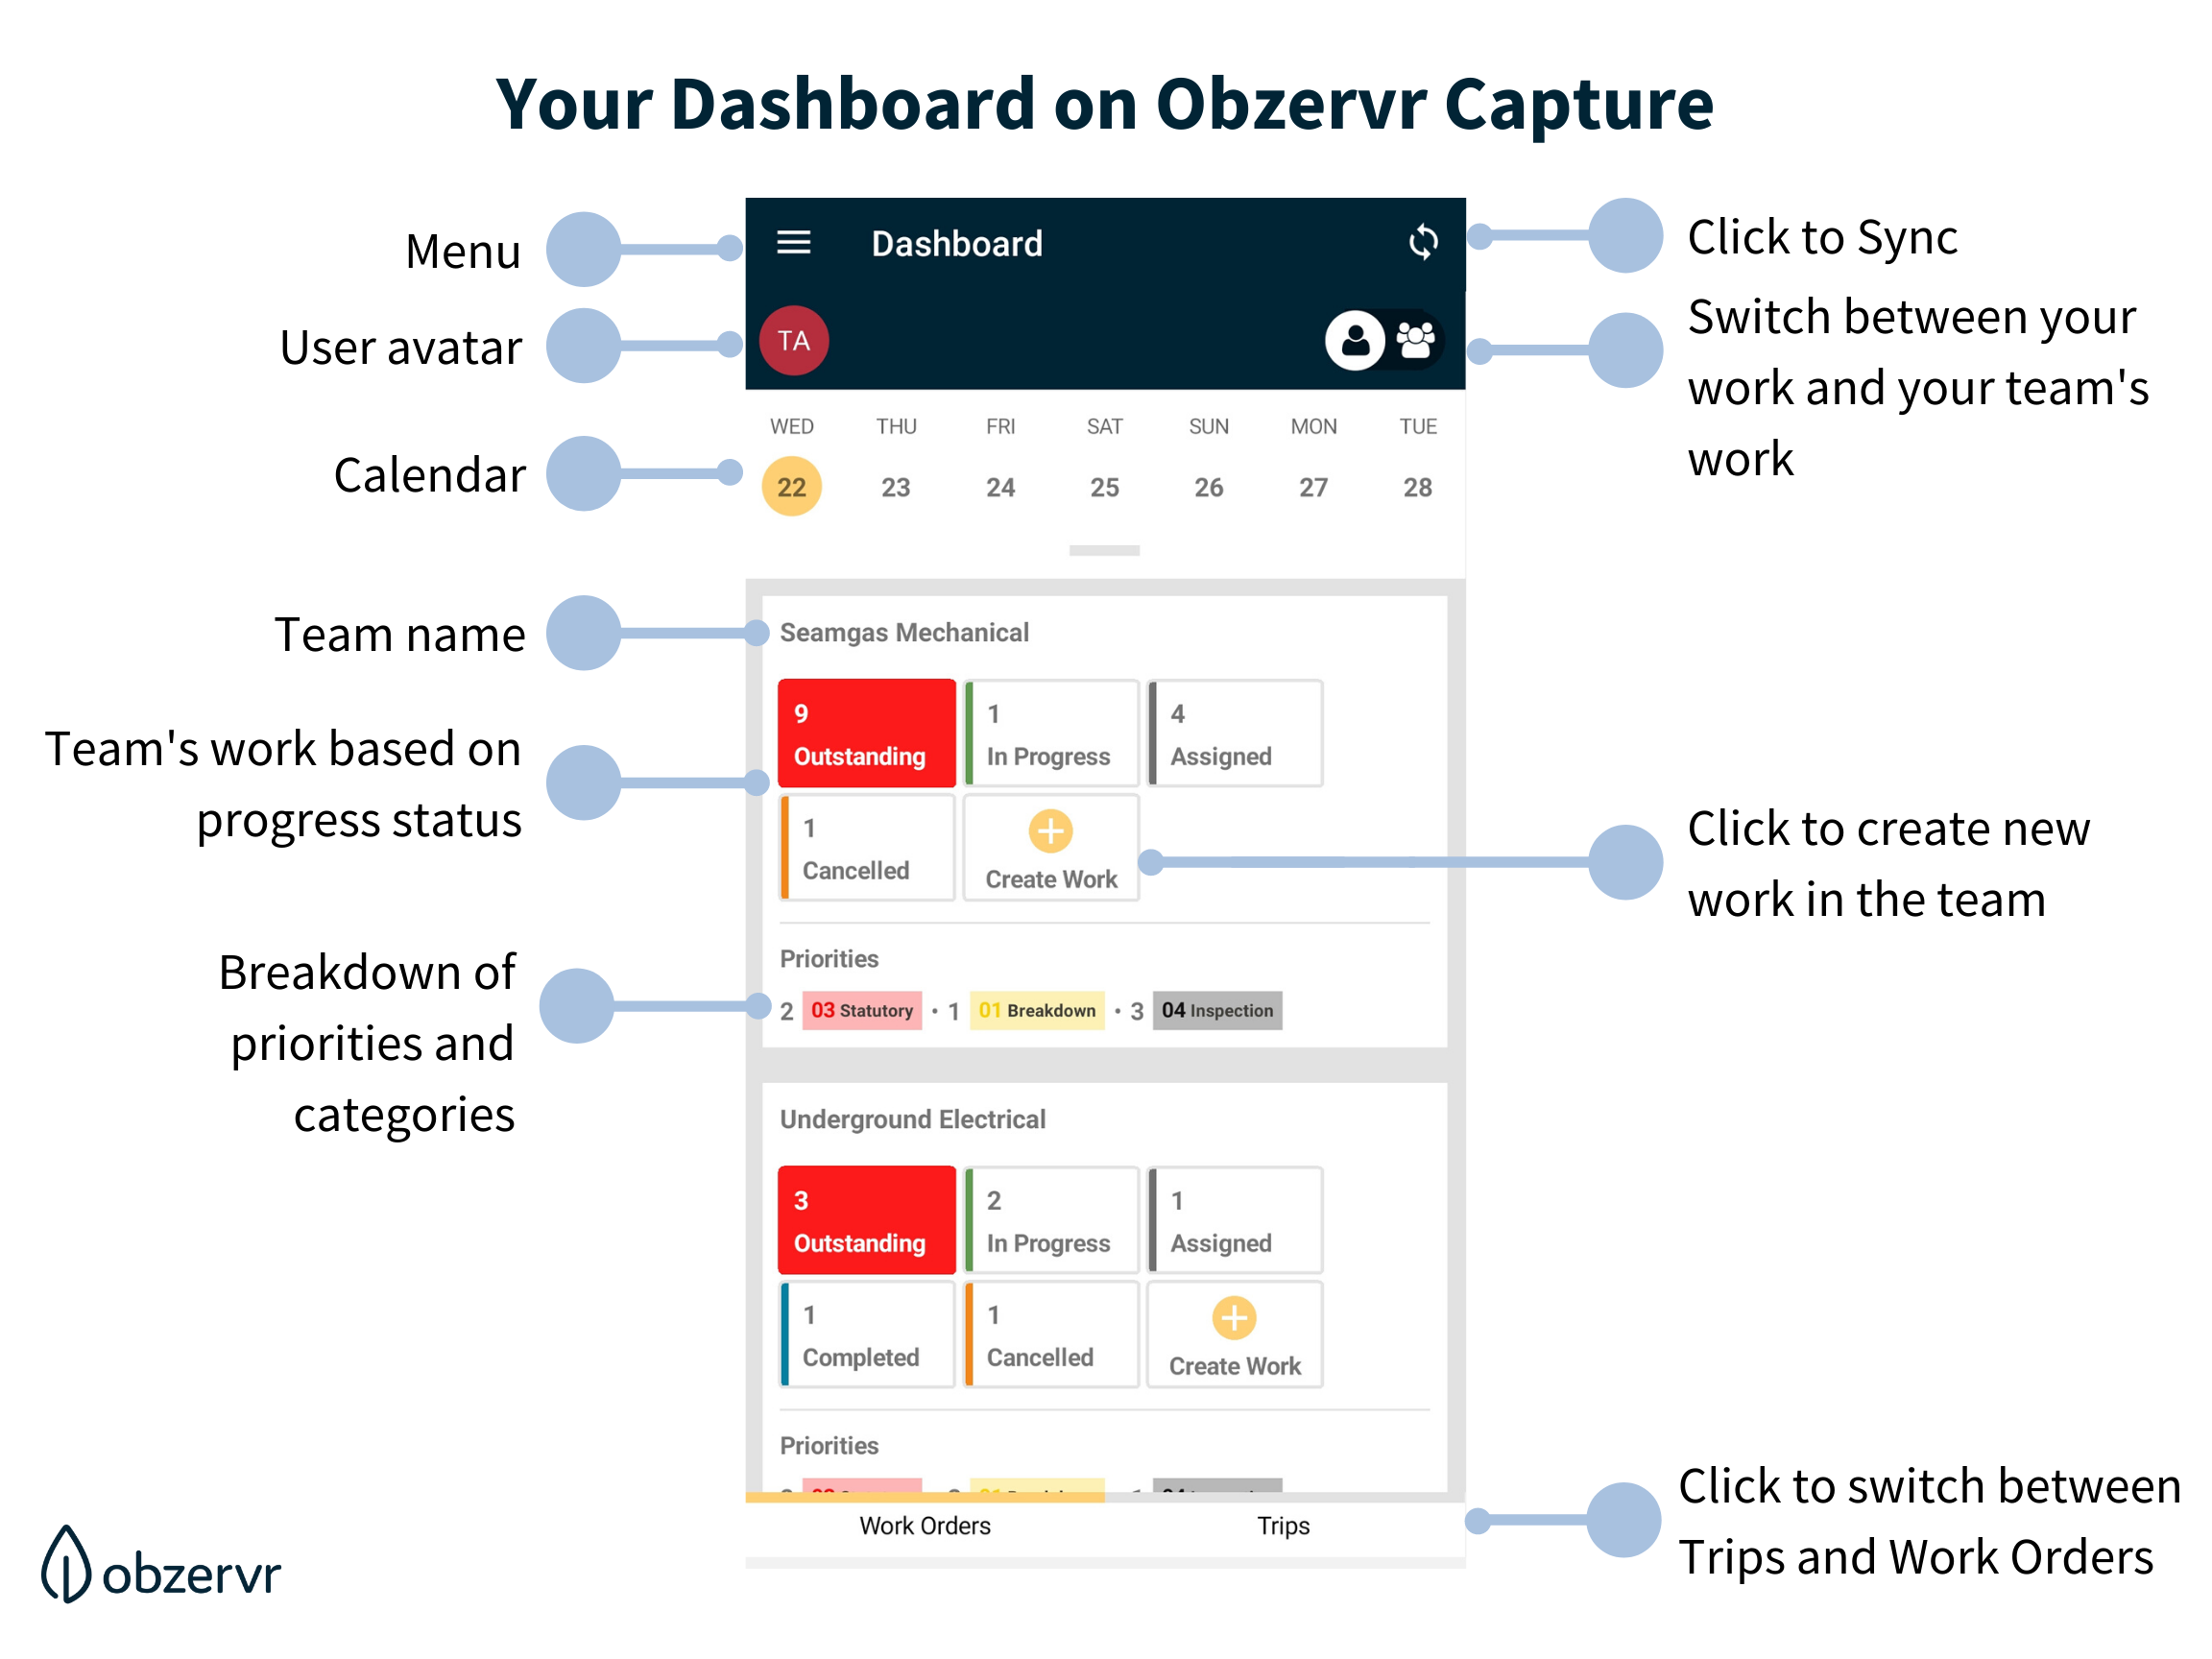
Figure 1: Obzervr Capture on mobile app
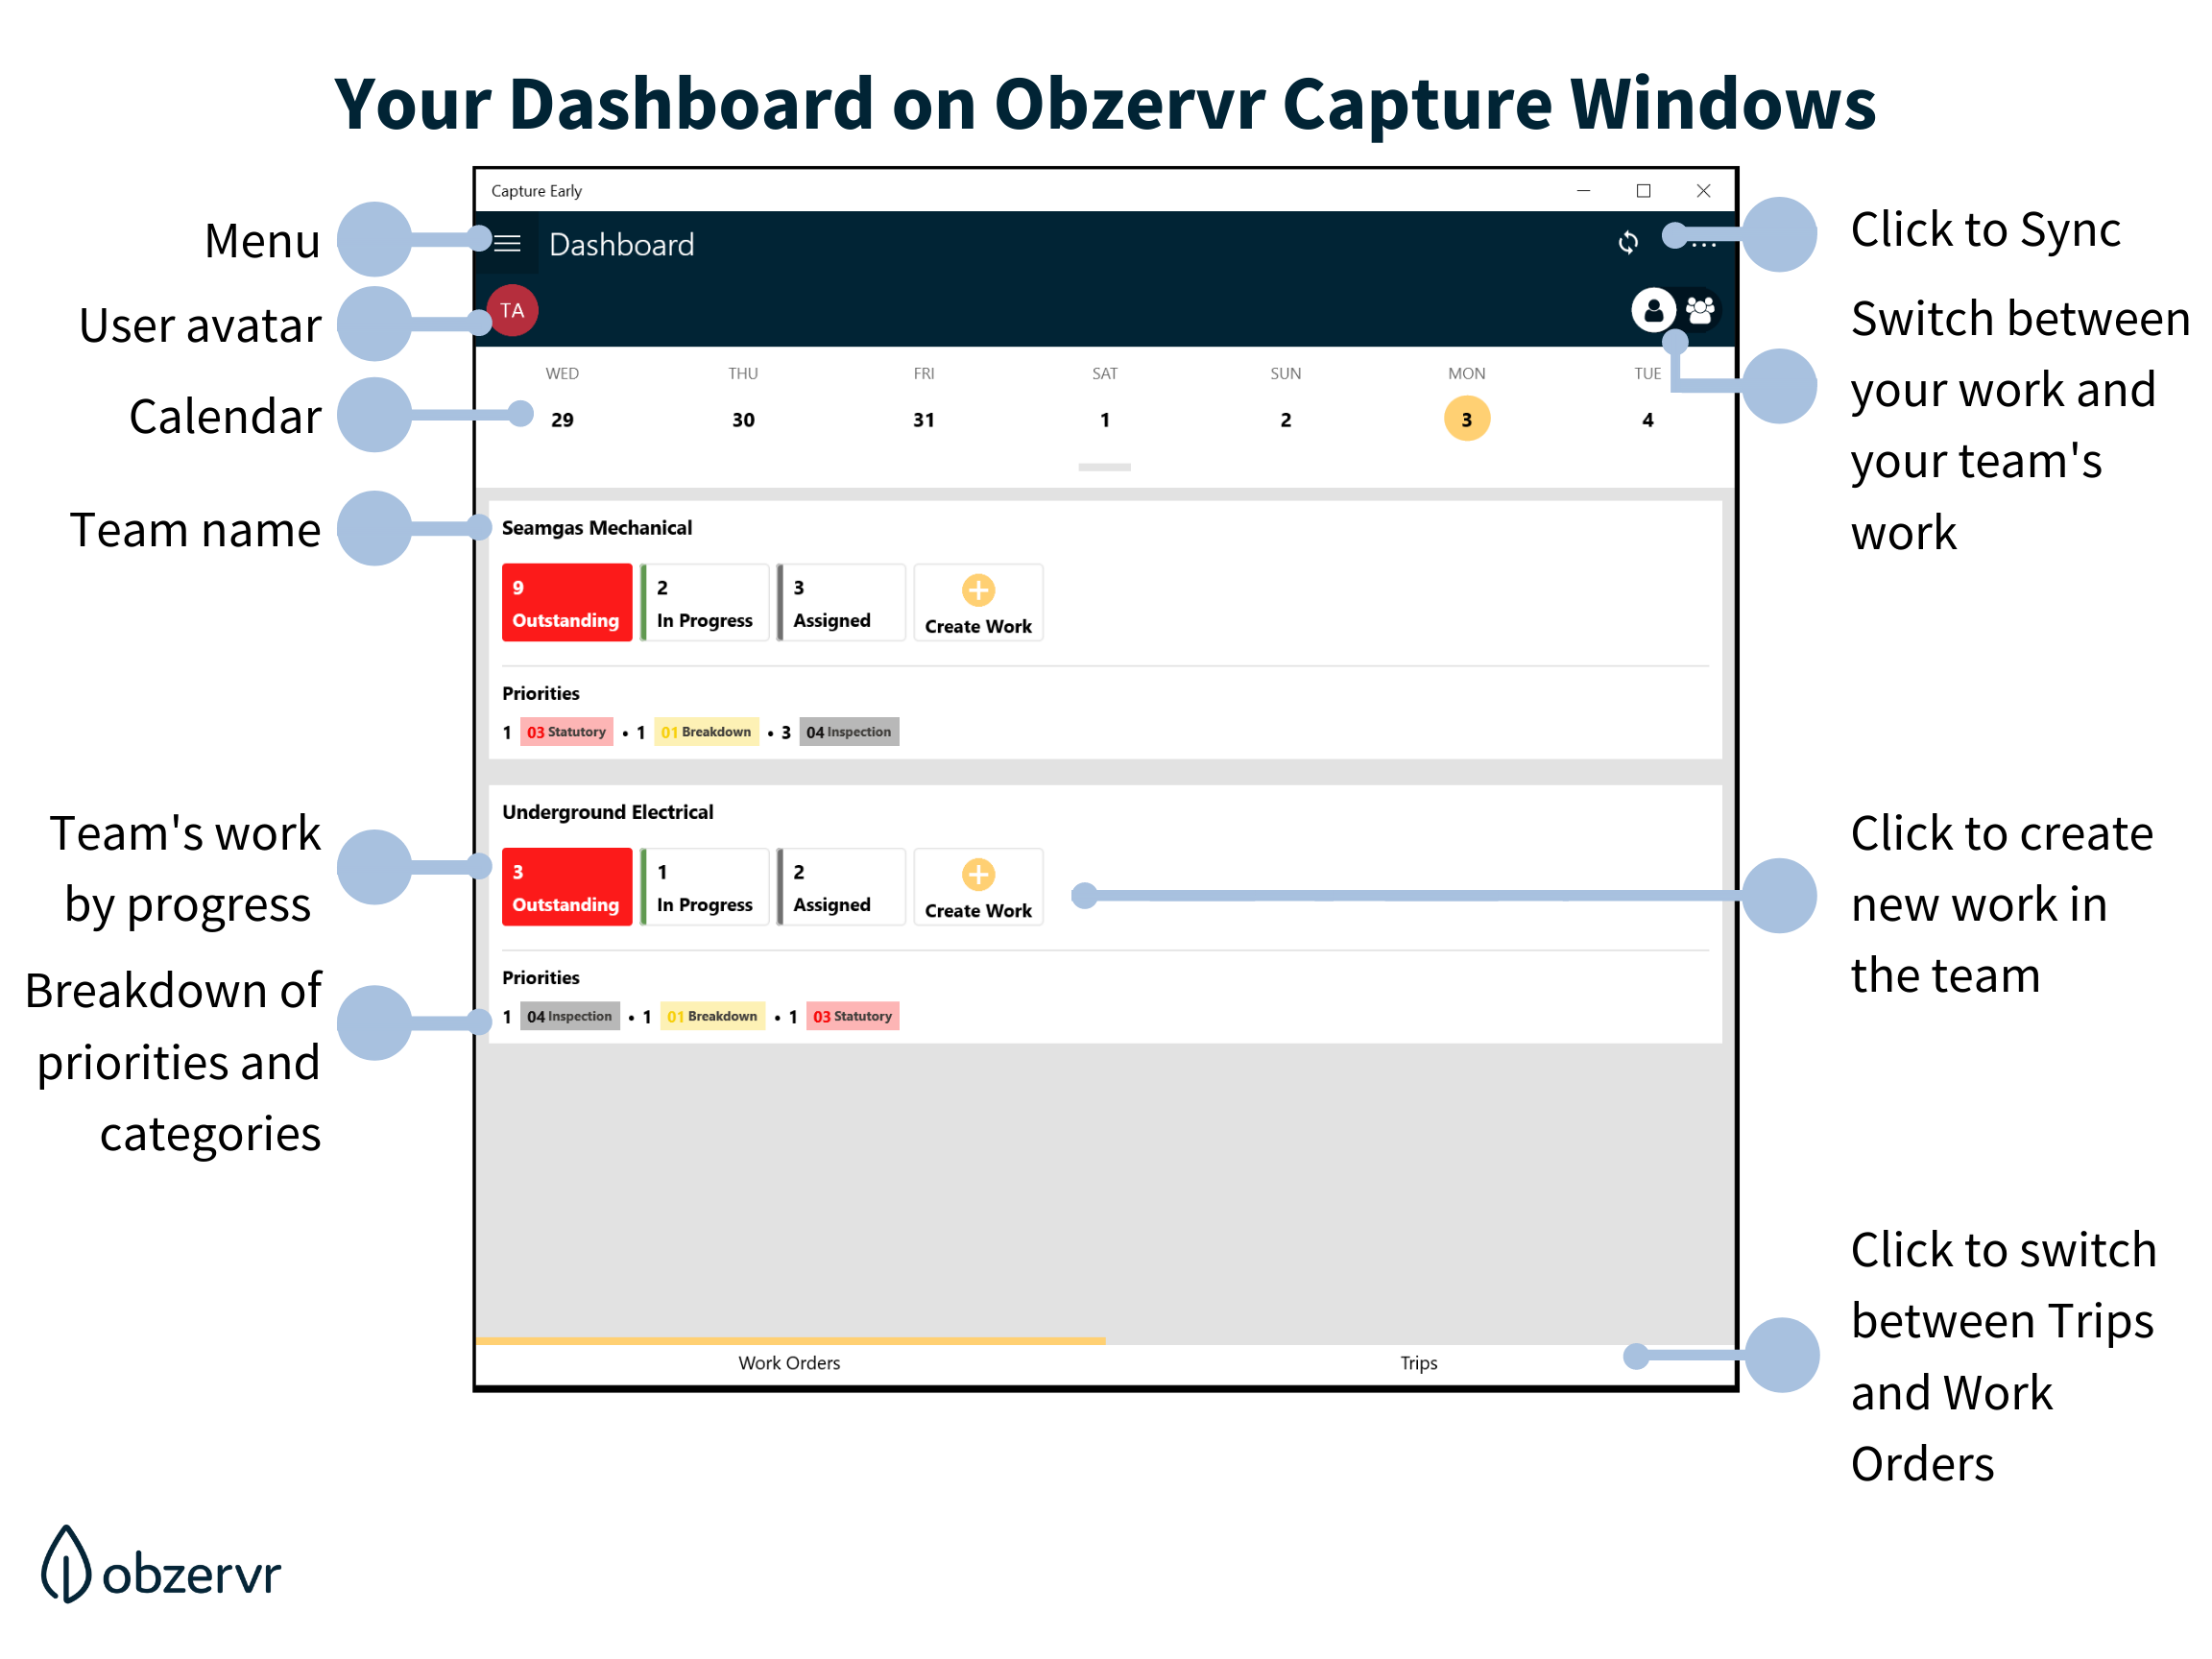
Figure 2: Obzervr Capture on Windows
Menu
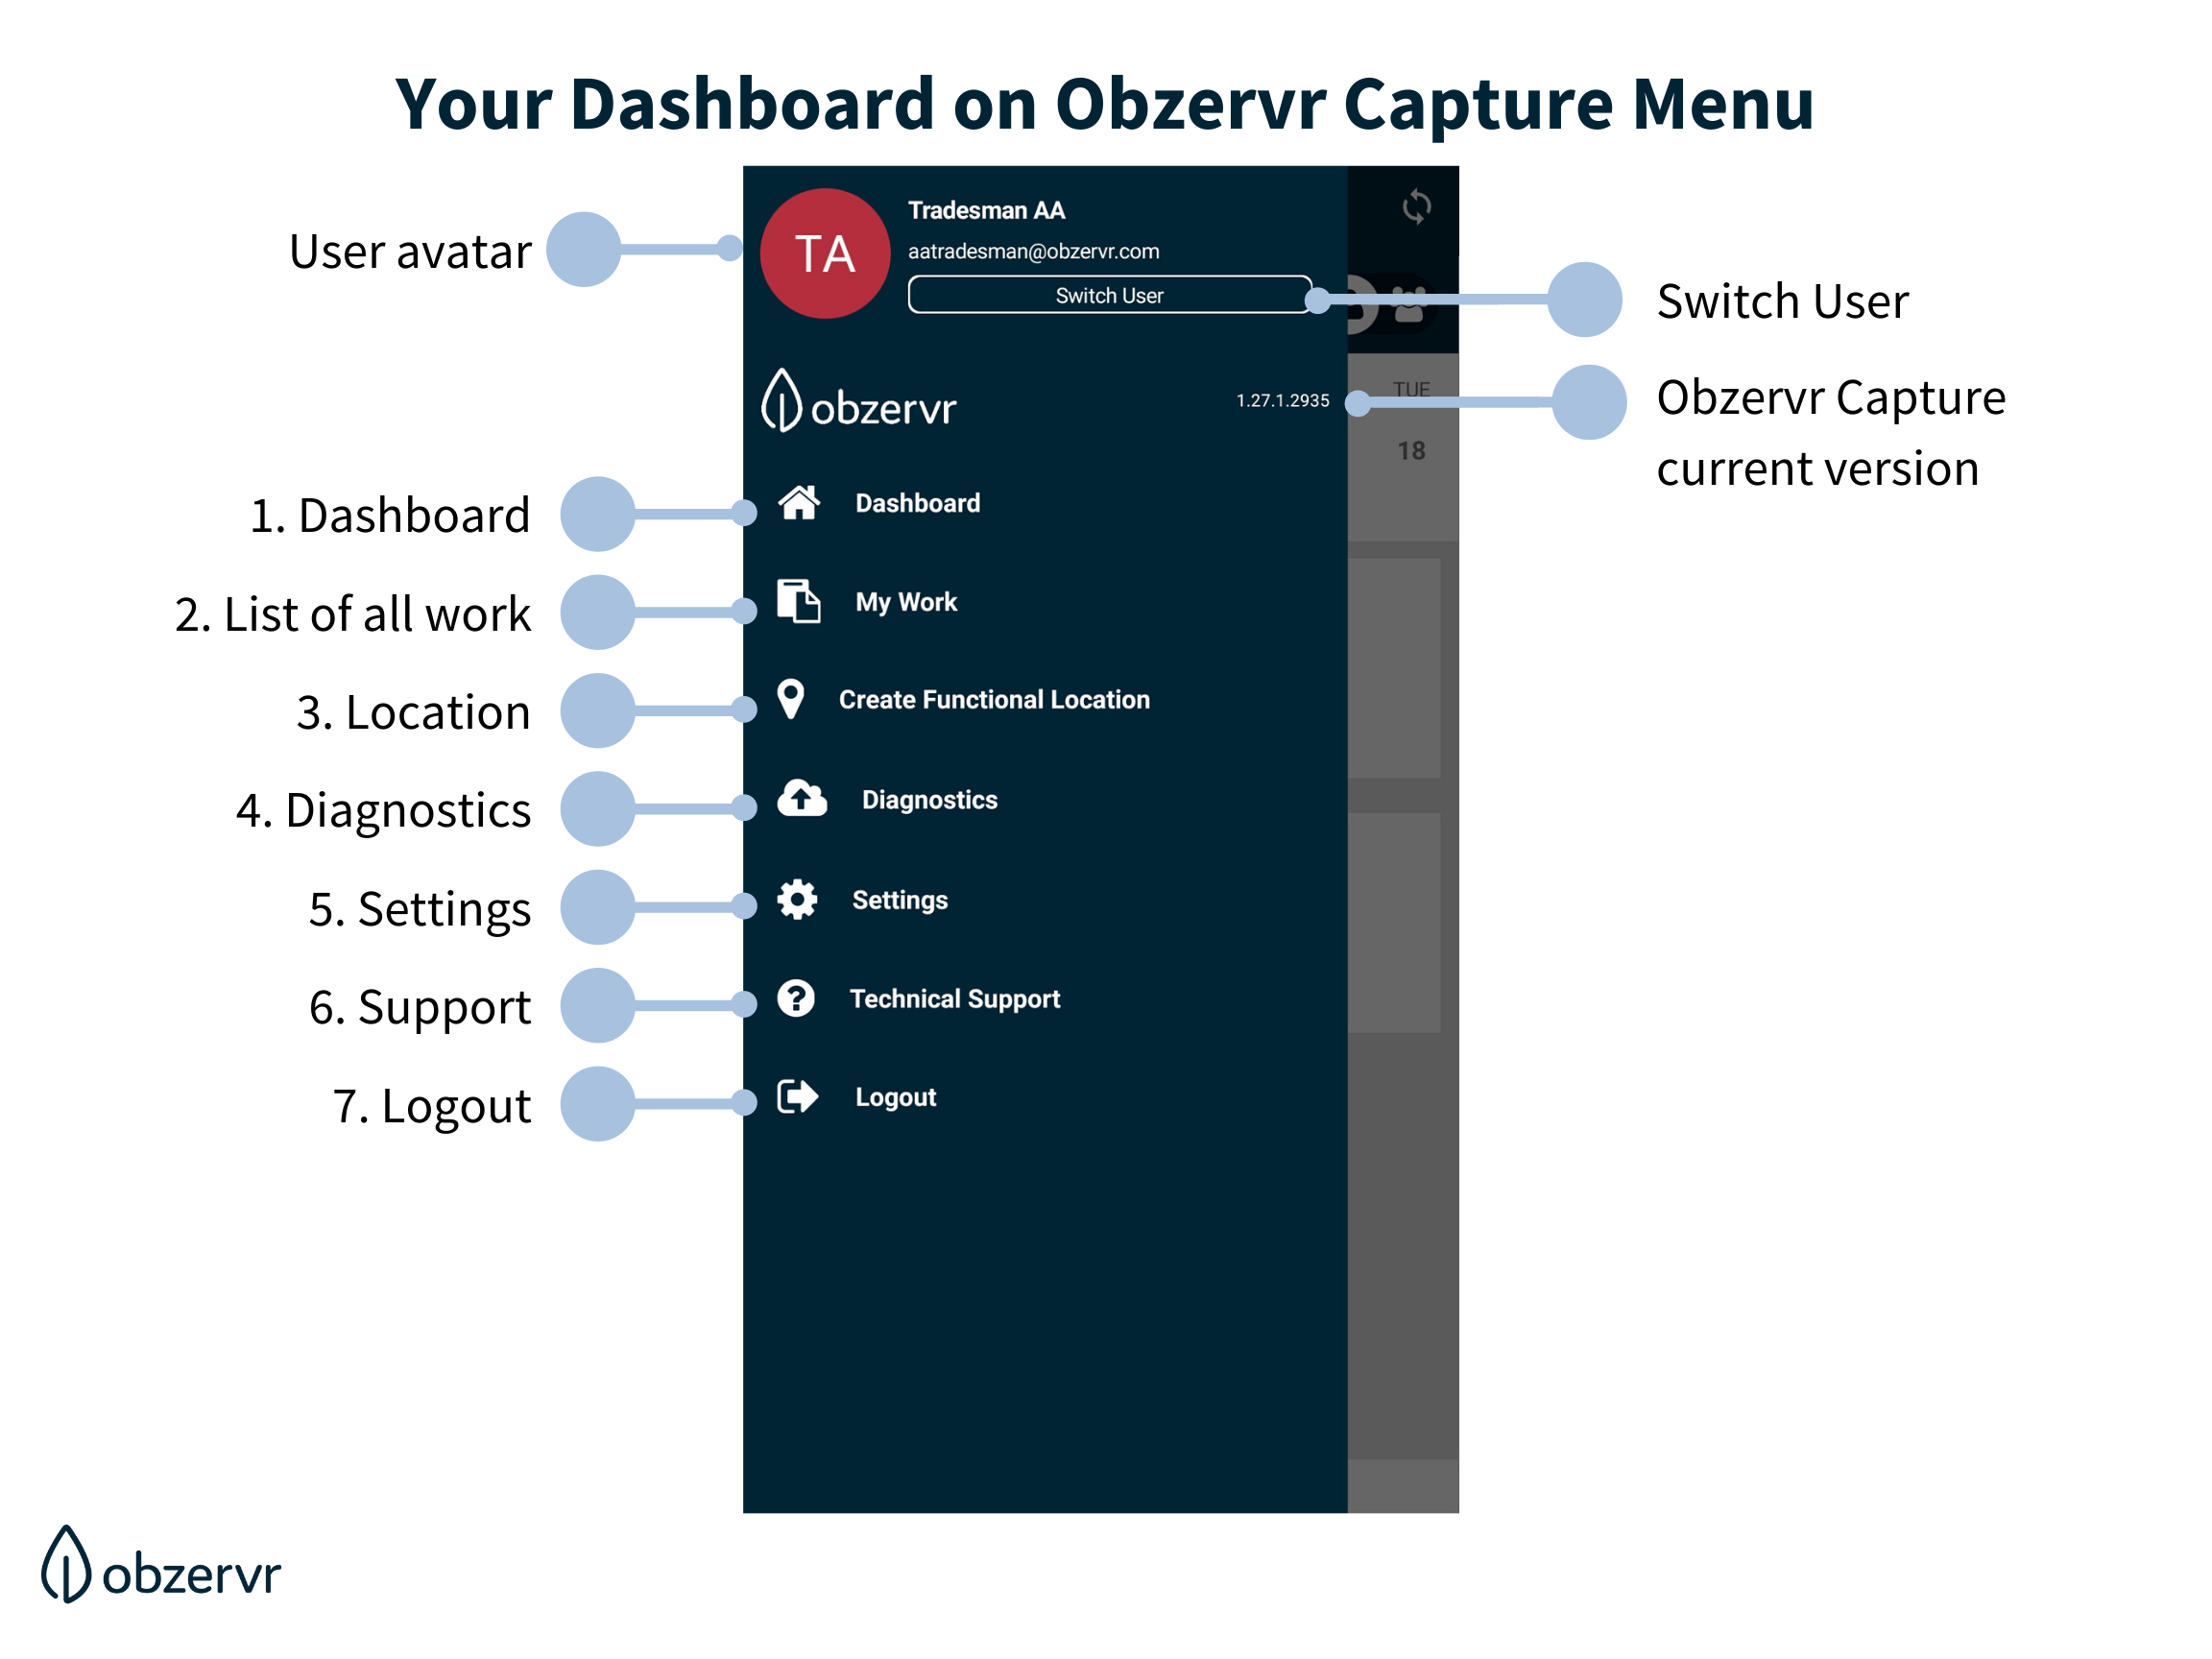
Figure 3: Obzervr Capture on mobile devices menu
The menu is the same for all the platform:
- Access to Dashboard. Check this article for more detailed information on this page.
- Access to My Work - the list of all Assignment in a chosen team. This page allows you to act on your Assignments. Check this article for more detailed information on this page.
- Location - create your Assignment Location with Sites and Mini-site templates. Check this article for more detailed information on this page.
- Diagnostics - to allow you to back up your data or undo changes. Check this article for more detailed information on this page.
- Setting - to allow you to change your Obzervr Capture view. Check this article for more detailed information on this page.
- Technical Support - to allow you to reach out for more help regarding the app. Check this article for more detailed information on this page.
- Log out - once you logged out, you cannot use Switch User and need to log in again.
So that's how you use the menu and dashboard in Obzervr Capture!
The next step is to learn basic actions for a Work on Obzervr Capture.
To further your understanding about getting started with Obzervr Capture, read the following
- How to use the Dashboard on Obzervr Capture
- How to switch between users and/or tenants
- How to change your view on Obzervr Capture
- How to reach out for help with Obzervr Capture
Otherwise, please go to Step 5: How to create a new Work to advance your progress with Obzervr!
---
Comments
0 comments
Please sign in to leave a comment.