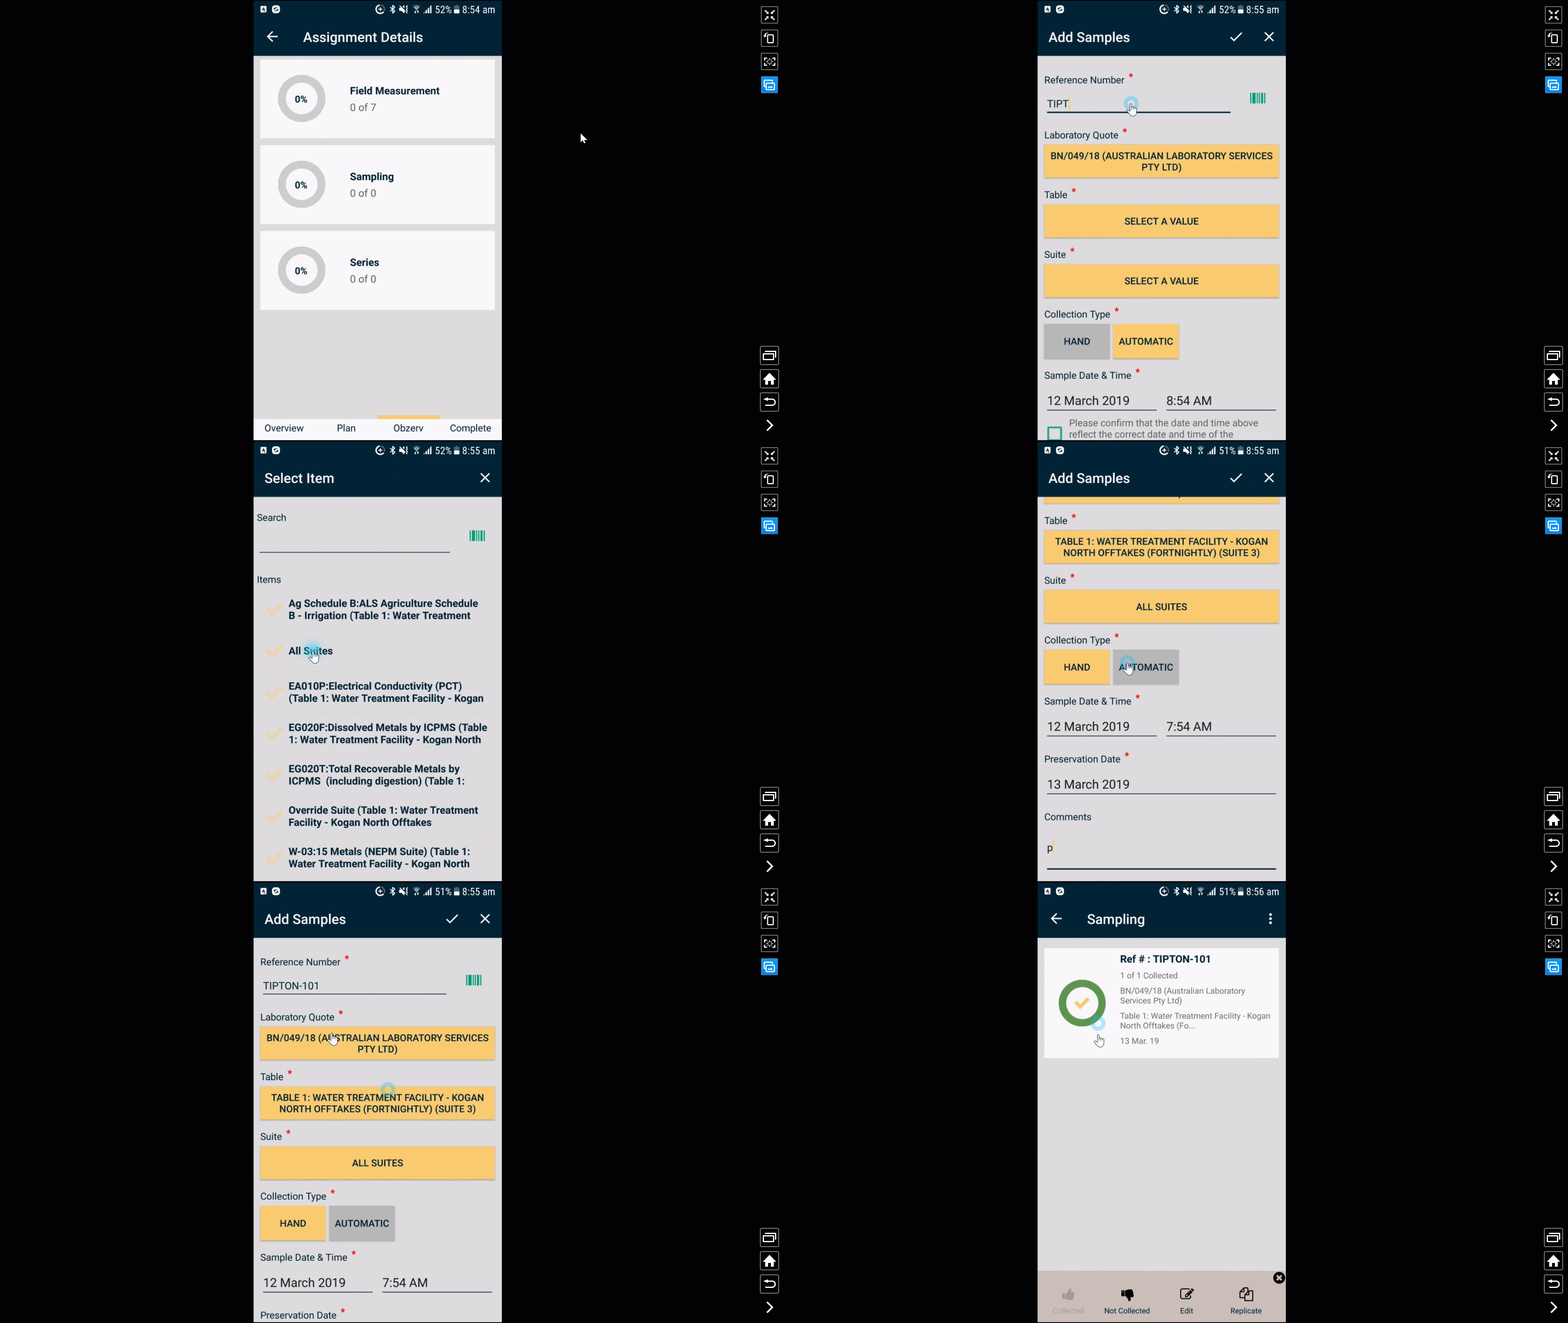
If you’re getting started using Obzervr Capture, you will need to learn how to add and collect samples on the app.
How to add and collect samples
- Navigate to Sampling1 in the Obzerv phase.
- If you are unable to collect the samples, select the “Tap here if samples can’t be collected” and enter a reason.
- Select the Plus icon to add your samples. This opens the Add Samples page.
- Here you can add a Reference Number2 for your sample, the Laboratory Quote or Test Plan, Table and Suite that the Laboratory will use to test the sample.
- Click to note if the sample was a hand (also known as manual or grab) sample or an automatic sample.
- Enter a preservation date and any comments.
- Click the tick to add the sample.
You have added samples to your Assignment. Next, you will need to collect the samples so that you can attach them to a Chain of Custody. To collect the sample, do the following:
- Click for More Options or click the progress circle to open the multi-select menu.
- On the multi-select menu, choose the Collected option.
You have collected samples!

Comments
0 comments
Please sign in to leave a comment.